> ## Documentation Index
> Fetch the complete documentation index at: https://agentcontrol-docs-add-source-code-notes-to-examples.mintlify.site/llms.txt
> Use this file to discover all available pages before exploring further.
# UI Quickstart
> Launch the Agent Control dashboard to manage controls and monitoring from your browser.
The Agent Control dashboard lets you manage [controls](/concepts/controls) and monitor agent activity — no code changes required.
## Prerequisites
Before starting the UI, make sure the **Agent Control server** is already running. If you haven't set it up yet, follow the [Quickstart](/quickstart) first.
You also need:
* **Node.js 20+** (CI uses 20; 18+ may work)
* **pnpm 9+** — install from [pnpm.io](https://pnpm.io/) or run `corepack enable && corepack prepare pnpm@latest --activate`
## Start the UI Server
From the root of the `agent-control` repository, run the following commands in a **separate terminal**:
```bash theme={null}
cd ui
pnpm install
pnpm dev
```
The dashboard is now running at [http://localhost:4000](http://localhost:4000).
Keep the Agent Control server (`make server-run`) and the UI (`pnpm dev`) running in separate terminal windows. The dashboard communicates with the server at `http://localhost:8000` by default.
Open [http://localhost:4000](http://localhost:4000). You should see an empty state — this is expected before any controls are registered.
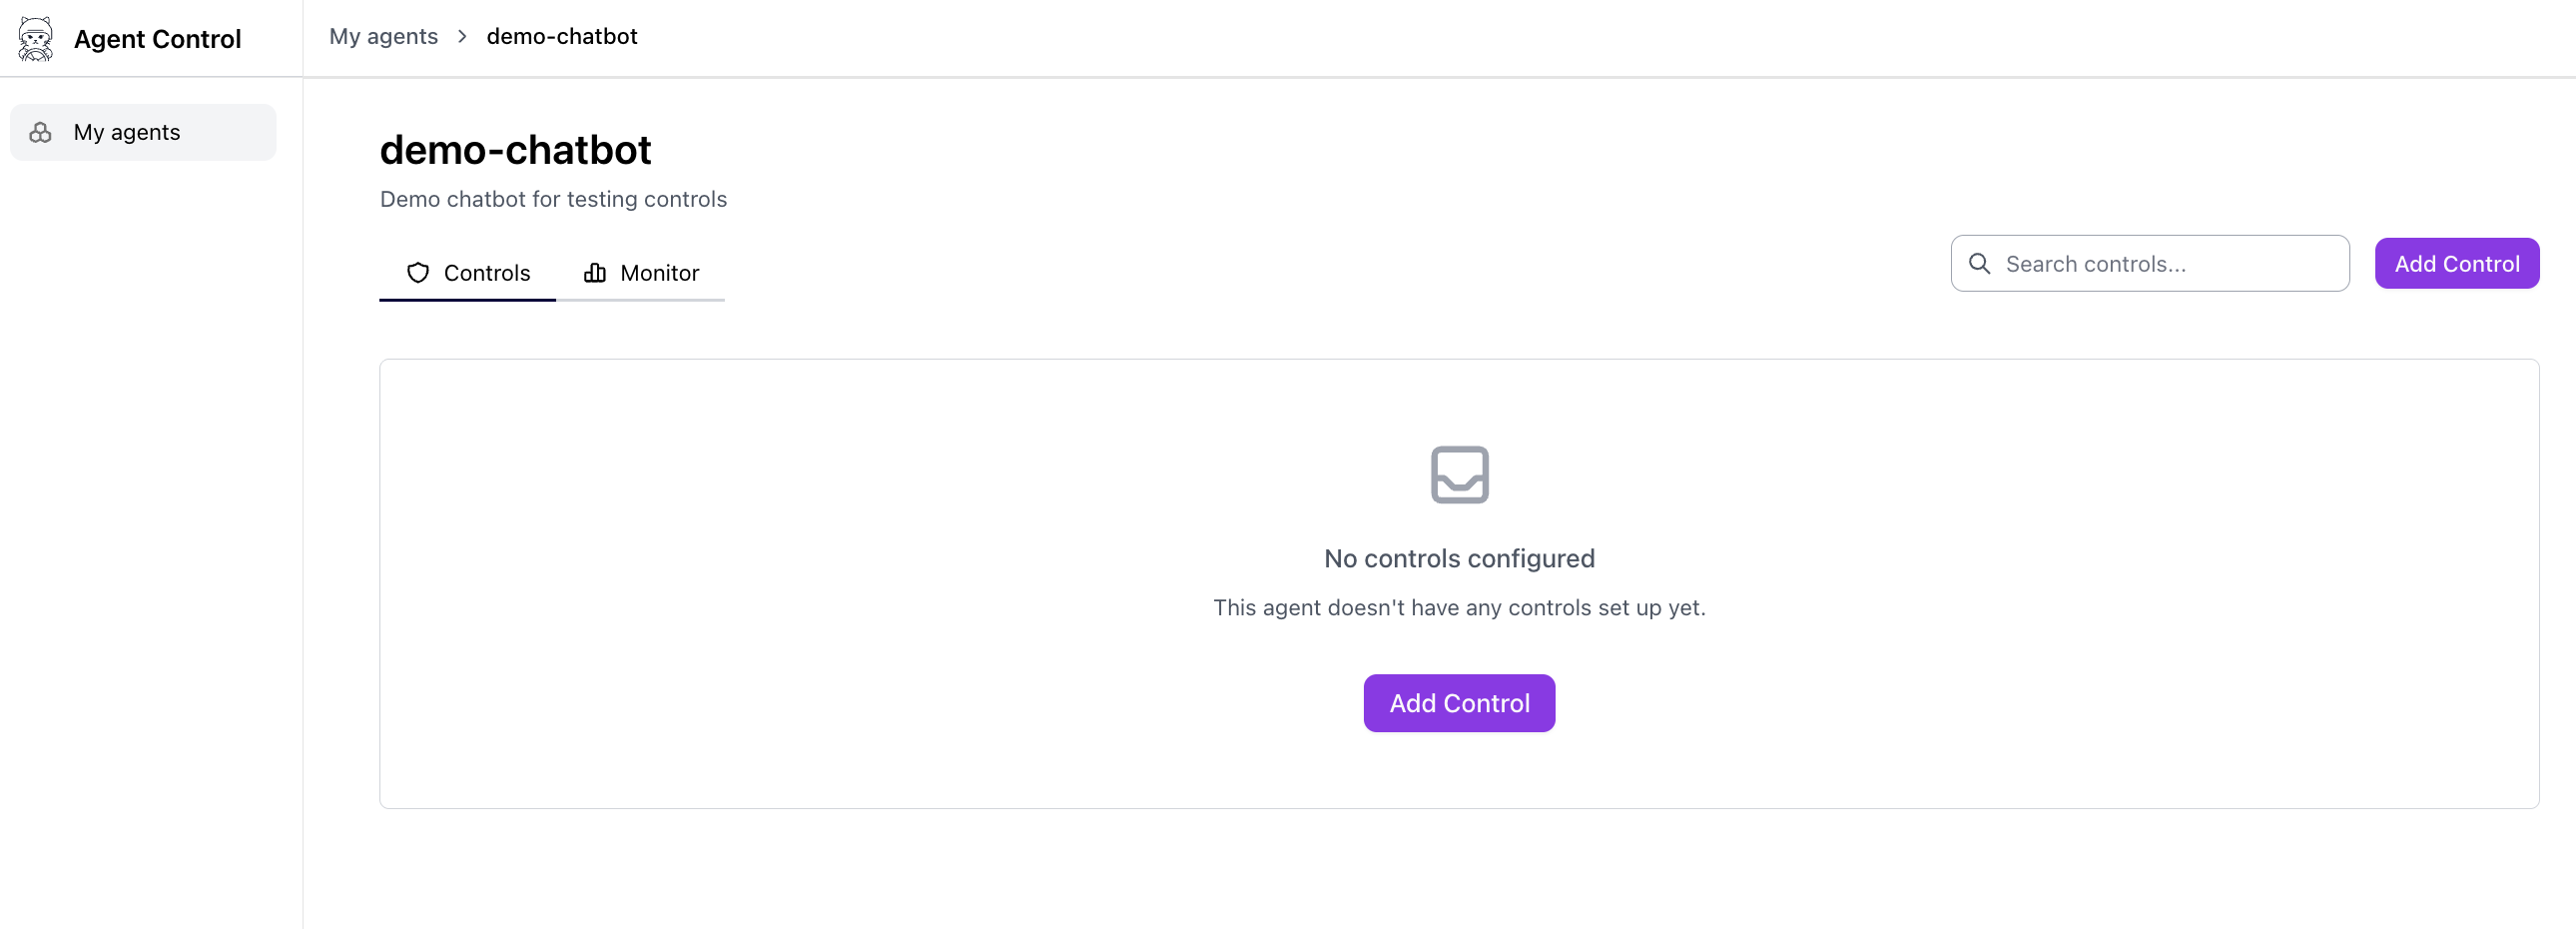 The dashboard reflects the server's current configuration. Controls appear here automatically once you create them.
## Create Controls from the UI
You can create controls directly in the dashboard — no scripts or SDK code required.
Click the **Add Control** button from the controls page to start creating a new control.
The dashboard reflects the server's current configuration. Controls appear here automatically once you create them.
## Create Controls from the UI
You can create controls directly in the dashboard — no scripts or SDK code required.
Click the **Add Control** button from the controls page to start creating a new control.
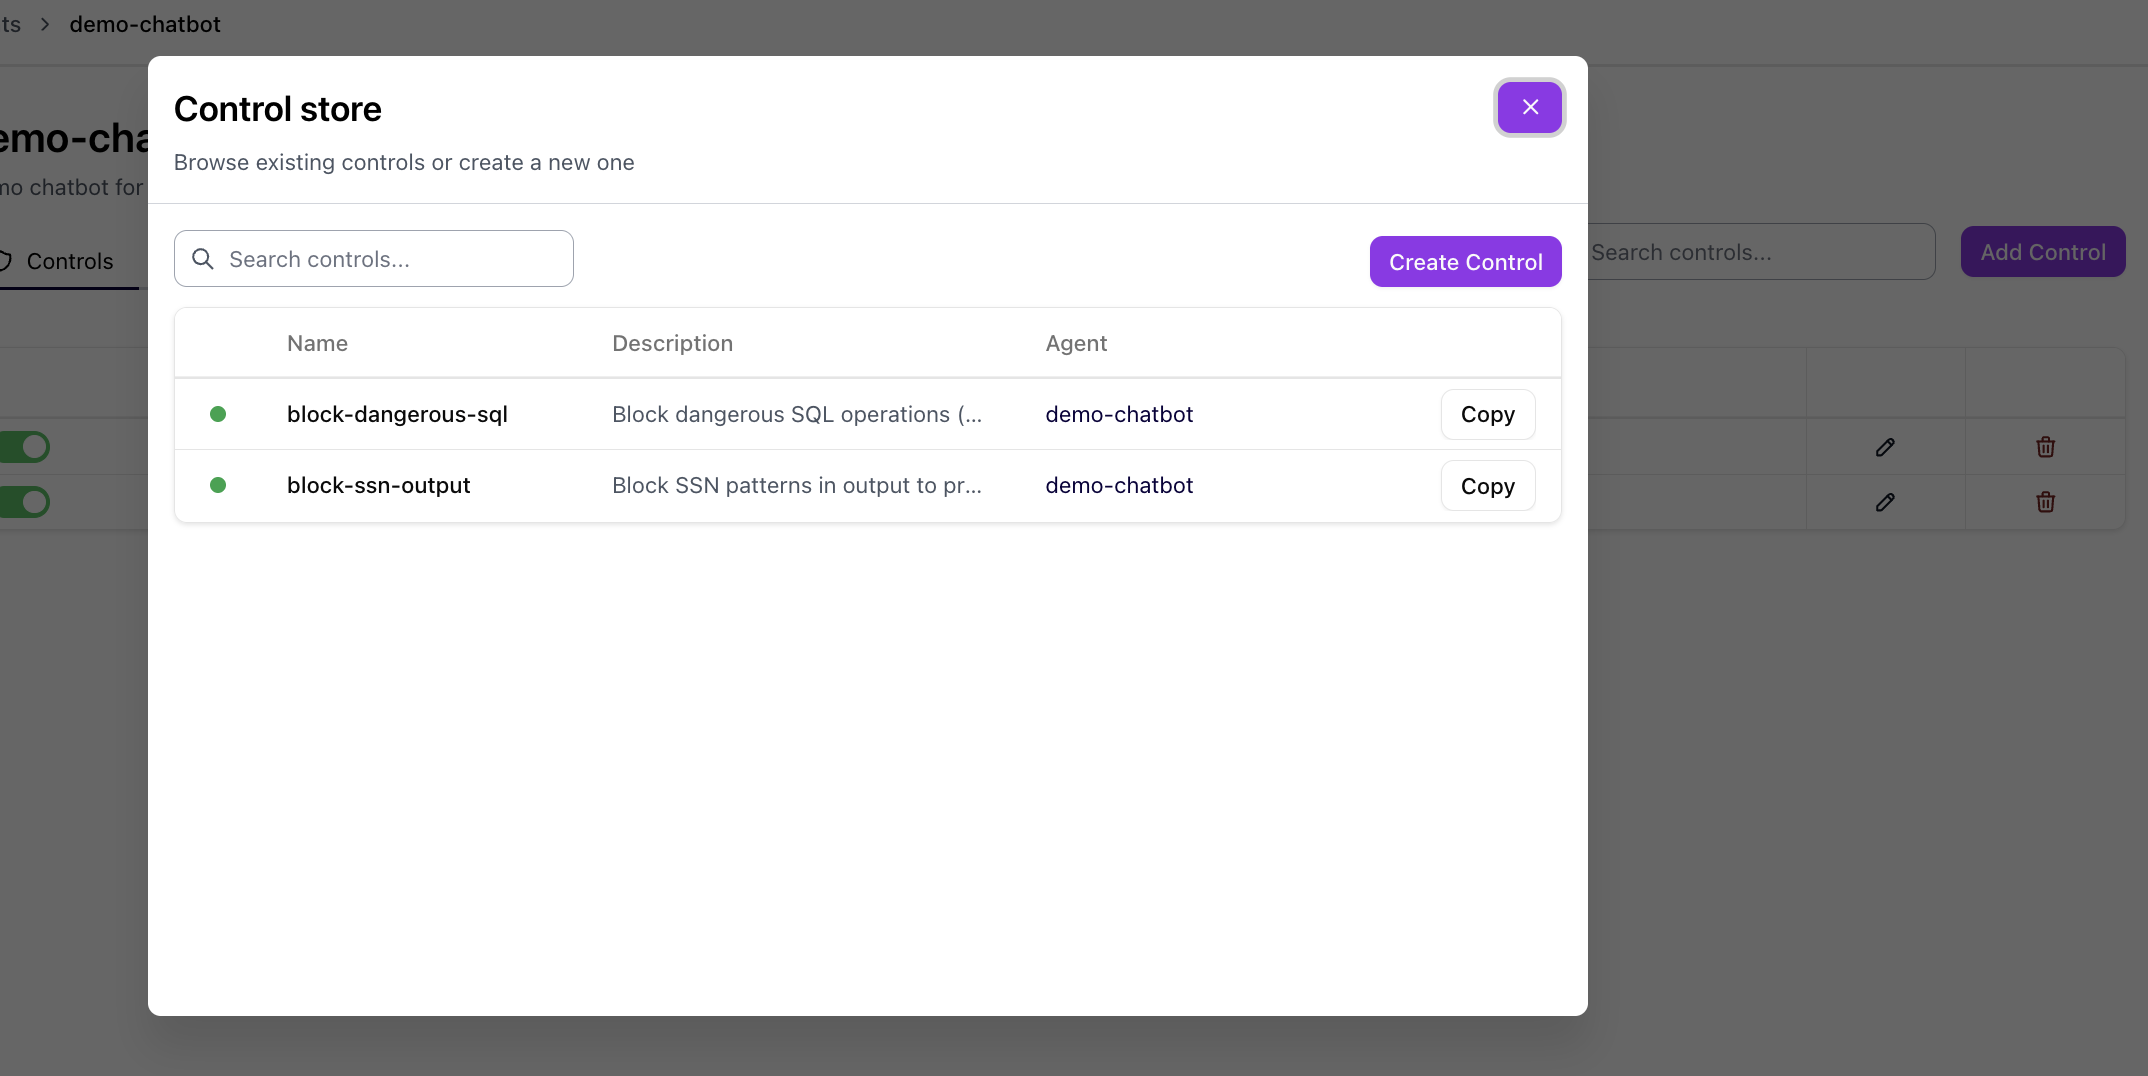 Choose an [evaluator](/concepts/evaluators/overview) type for your control. Options include [Regex](/concepts/evaluators/built-in-evaluators), List, [JSON](/concepts/evaluators/json), [SQL](/concepts/evaluators/sql), and [AI-powered](/concepts/evaluators/custom-evaluators) evaluators.
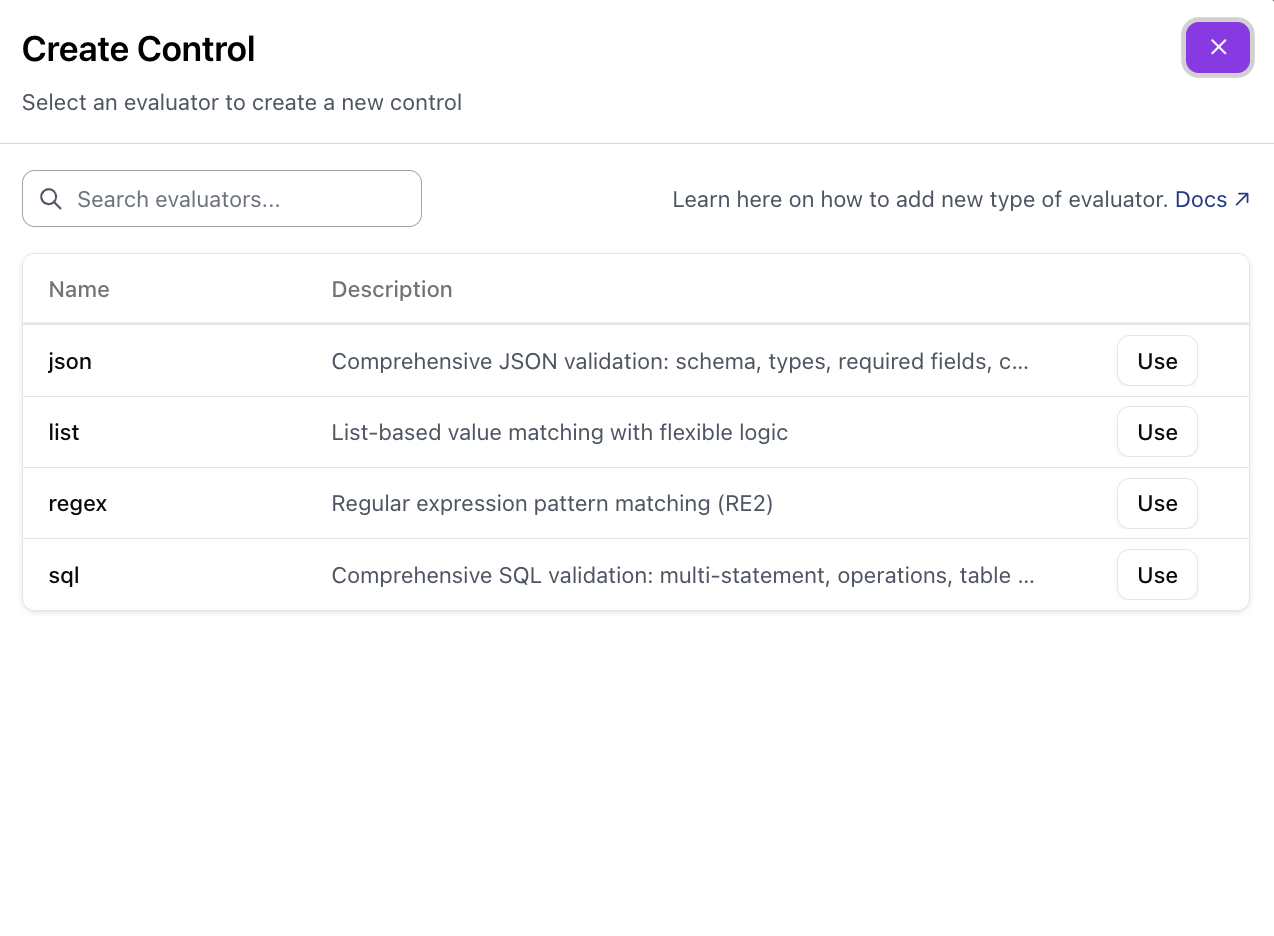 Fill in the control details. See [Controls](/concepts/controls) for a full explanation of each field.
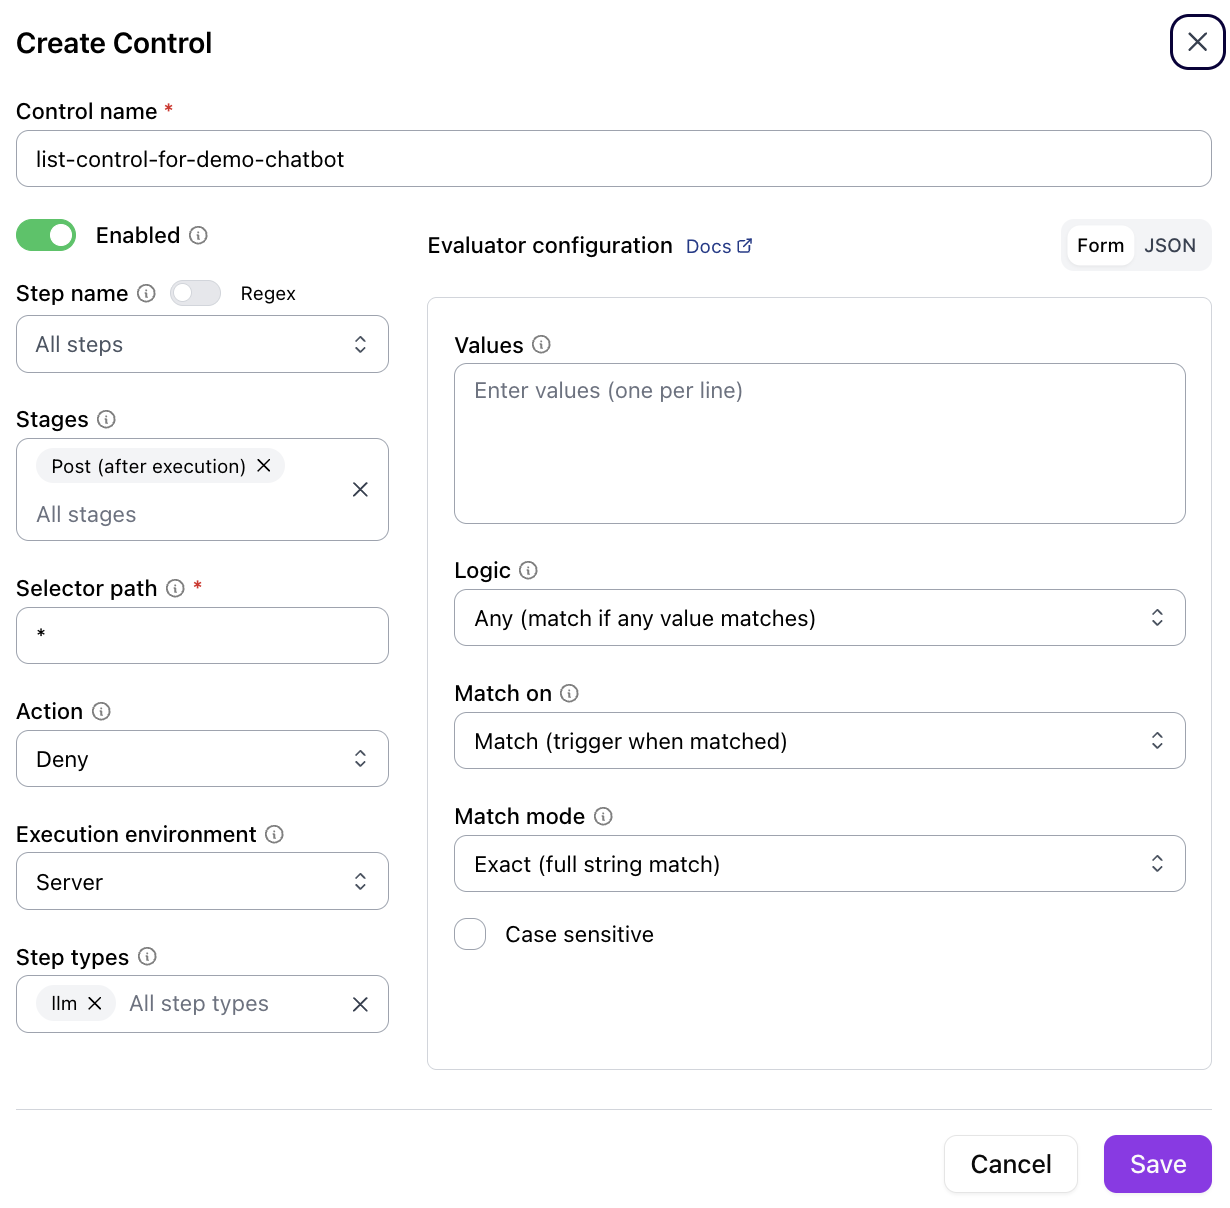 | Field | Description |
| --------------------------- | ----------------------------------------------------------------------- |
| **Control name** | A unique identifier for the control |
| **Enabled** | Toggle the control on or off |
| **Stages** | When to evaluate — `Pre` (before execution) or `Post` (after execution) |
| **Selector path** | The data path to evaluate (for example, `*` for all fields) |
| **Action** | What happens on a match — `Deny` blocks the request |
| **Execution environment** | Where evaluation runs — `Server` or `Client` |
| **Evaluator configuration** | Type-specific settings (values, logic, match mode, case sensitivity) |
Click **Save** to register the control. It takes effect immediately — no redeployment needed.
## Regenerate API Types (Optional)
If you update the server API and need fresh UI types, regenerate them from the running server:
```bash theme={null}
pnpm fetch-api-types # fetches from http://localhost:8000/openapi.json
```
## Monitoring
The monitoring dashboard shows real-time control activity across all agents:
| Field | Description |
| --------------------------- | ----------------------------------------------------------------------- |
| **Control name** | A unique identifier for the control |
| **Enabled** | Toggle the control on or off |
| **Stages** | When to evaluate — `Pre` (before execution) or `Post` (after execution) |
| **Selector path** | The data path to evaluate (for example, `*` for all fields) |
| **Action** | What happens on a match — `Deny` blocks the request |
| **Execution environment** | Where evaluation runs — `Server` or `Client` |
| **Evaluator configuration** | Type-specific settings (values, logic, match mode, case sensitivity) |
Click **Save** to register the control. It takes effect immediately — no redeployment needed.
## Regenerate API Types (Optional)
If you update the server API and need fresh UI types, regenerate them from the running server:
```bash theme={null}
pnpm fetch-api-types # fetches from http://localhost:8000/openapi.json
```
## Monitoring
The monitoring dashboard shows real-time control activity across all agents:
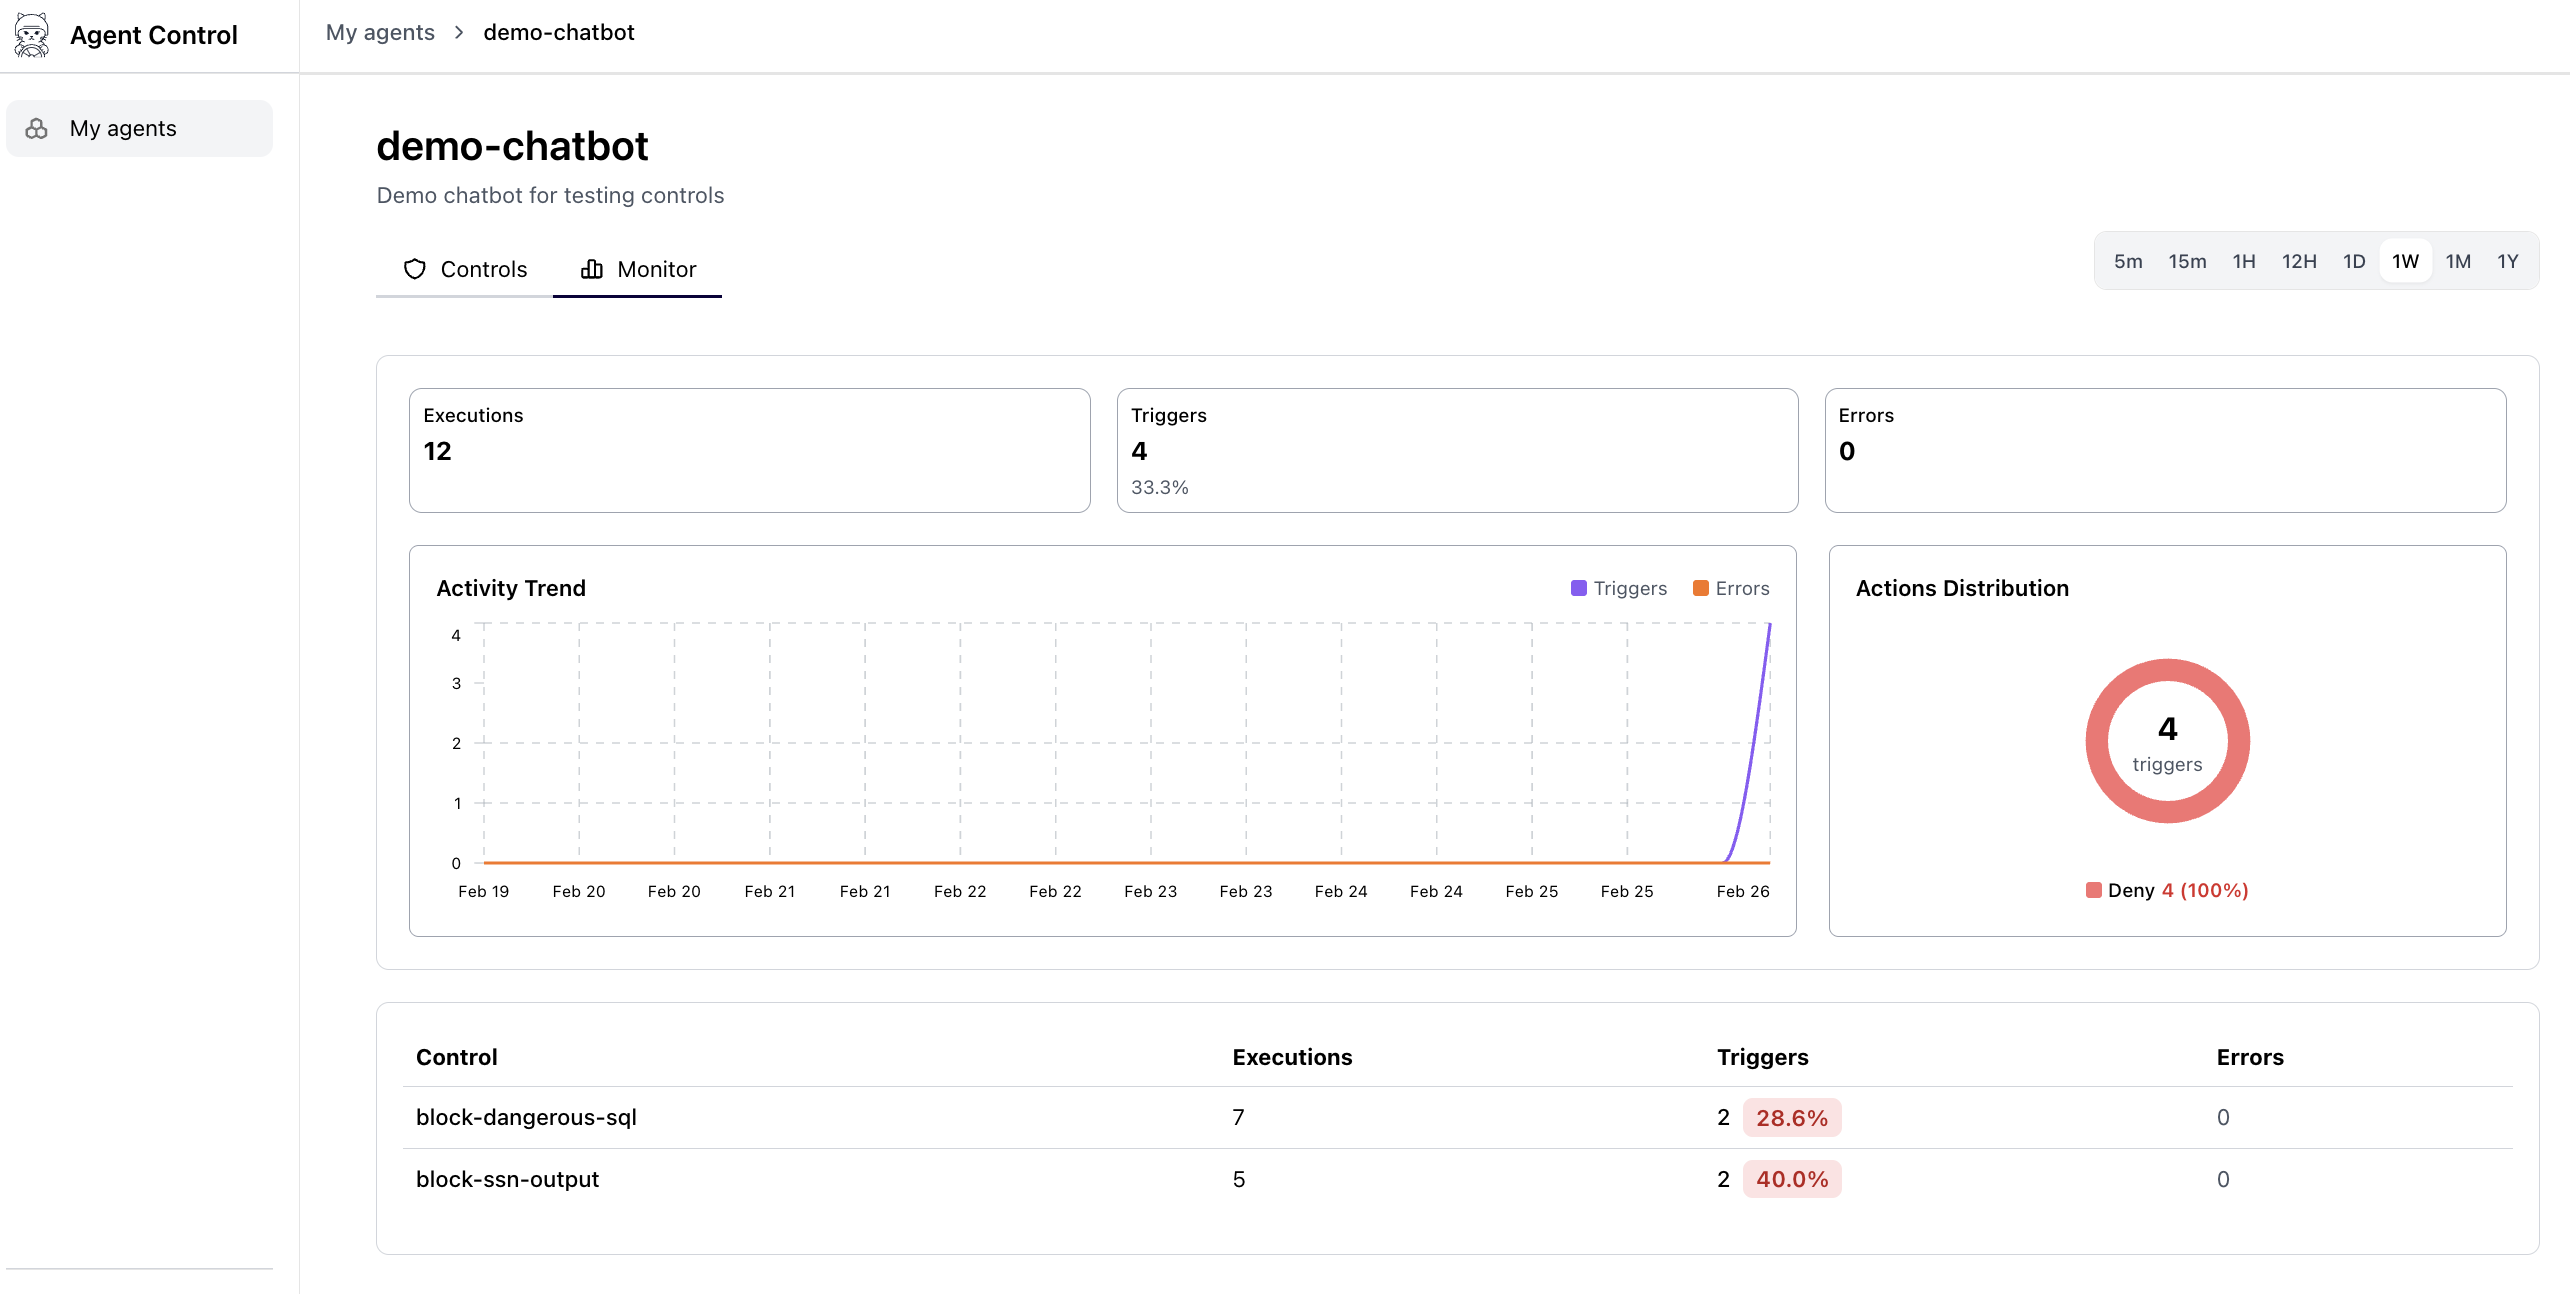 * **Total evaluations** — Requests processed per control
* **Block count** — Requests denied per control
* **Pass/block ratio** — Visual breakdown of allowed vs. blocked operations
* **Activity timeline** — Recent evaluations with timestamps
Use this view to verify controls are working, spot patterns that need tuning, and audit which controls triggered on which agent.
Monitoring data populates as agents process requests. Run the [Agent Control Demo](/examples/agent-control-demo) to generate sample data:
```bash theme={null}
uv run python examples/agent_control_demo/demo_agent.py
```
## Next Steps
Full end-to-end walkthrough with runnable scripts.
Learn how to define controls using the SDK or API.
Explore built-in and custom evaluator types.
Server configuration, authentication, and deployment options.
* **Total evaluations** — Requests processed per control
* **Block count** — Requests denied per control
* **Pass/block ratio** — Visual breakdown of allowed vs. blocked operations
* **Activity timeline** — Recent evaluations with timestamps
Use this view to verify controls are working, spot patterns that need tuning, and audit which controls triggered on which agent.
Monitoring data populates as agents process requests. Run the [Agent Control Demo](/examples/agent-control-demo) to generate sample data:
```bash theme={null}
uv run python examples/agent_control_demo/demo_agent.py
```
## Next Steps
Full end-to-end walkthrough with runnable scripts.
Learn how to define controls using the SDK or API.
Explore built-in and custom evaluator types.
Server configuration, authentication, and deployment options.